

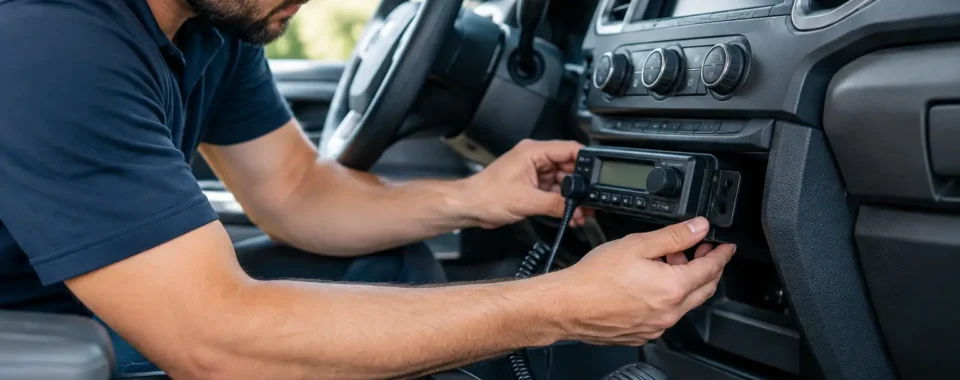

A mobile radio can be the most dependable communications tool in a vehicle, but only when the installation is treated as part of the system design. A strong radio mounted to a weak bracket, powered through the wrong circuit, or paired with a poorly located antenna will not deliver the coverage or reliability your team expects. Knowing how to install mobile radios correctly helps protect the vehicle, the equipment, and the people who rely on it in the field.
For fleets, service trucks, agricultural vehicles, security operations, and event teams, the goal is not simply to get the radio powered on. The goal is clear communication with a safe, durable installation that can handle vibration, heat, weather, and daily use.
Start With the Vehicle and Radio Plan
Before drilling holes or running wire, confirm the radio is appropriate for the communications system. A VHF, UHF, CB, GMRS, amateur, or commercial DMR mobile radio has different antenna, licensing, programming, and installation considerations. Push-to-Talk over Cellular equipment may also be mounted in vehicles, but it relies primarily on cellular coverage rather than an externally tuned RF antenna.
Consider how the vehicle is used. A delivery van may need a compact control head that keeps the center console clear. A utility truck may have room for a full-size radio body under a rear seat or inside a protected equipment compartment. A patrol or security vehicle may need the microphone, speaker, display, and emergency controls within immediate reach.
Choose mounting locations before ordering brackets and cable lengths. You need space for the radio, the antenna cable route, the power harness, and airflow around the equipment. Check behind any proposed mounting point for airbags, wiring looms, HVAC components, fuel lines, and vehicle electronics. Modern vehicles have more hidden systems than older work trucks, so guessing is expensive.
Choose a Safe Radio Mounting Location
The radio must be secure enough to remain in place during hard braking, rough roads, and normal fleet use. A mounting point should also let the operator see the display and reach the controls without taking attention away from driving.
For many installations, the radio body can go under a seat, behind a seat, in a console, or in a purpose-built equipment rack. Remote-head radios are particularly useful when dashboard space is limited. The main chassis can be mounted out of sight while the compact control head is placed where the driver can operate it safely.
Avoid mounting the radio directly against carpet, insulation, or other surfaces that trap heat. Most mobile radios need ventilation around their heat sink. Heat shortens equipment life and can cause a radio to reduce transmit power or shut down under heavy use.
Use a vehicle-specific console mount, a manufacturer-approved bracket, or a properly installed universal bracket. Sheet-metal screws can work in the right application, but they are not the answer for every vehicle or every radio. Heavier commercial radios and off-road vehicles often require stronger mounting hardware, backing plates, or a dedicated equipment console.
Keep Safety Systems Clear
Never mount a radio, control head, microphone clip, or speaker where it could interfere with airbag deployment, seat movement, steering, pedals, gear selection, or visibility. This includes A-pillar areas, steering-column zones, and portions of the dash identified by the vehicle manufacturer as airbag deployment paths.
The microphone should be easy to grab but should not become a projectile in a collision. Mount it where the cord will not snag the shifter, parking brake, or driver’s legs.
Wire Power Directly and Protect the Circuit
Power wiring is one of the most common causes of unreliable mobile radio performance. A radio may turn on when tapped into an accessory circuit, yet still suffer voltage drop, ignition noise, random resets, or reduced transmit performance. For professional installations, run the power leads directly to the vehicle battery whenever practical.
Use the radio manufacturer’s supplied power cable or wire of equal or greater capacity. Keep the cable run as short as reasonably possible, and protect it with split loom or abrasion-resistant sleeving where it passes through the engine bay, firewall, or under-seat areas.
Install fuses close to the battery connection. Many mobile radio harnesses use both positive and negative lead fuses, and they should not be removed or bypassed. The fuse protects the wiring if a fault occurs, not just the radio itself.
Route power wiring away from exhaust components, sharp edges, moving pedals, steering components, and high-current vehicle wiring. Where wire passes through metal, use an existing protected pass-through when available or install a correctly sized grommet. A bare wire rubbing against sheet metal may work fine for months before it creates a short circuit at exactly the wrong time.
Some radios use an ignition-sense lead so the unit can turn on and off with the vehicle. This lead typically draws very little current and can be connected to a suitable switched source, while the main radio power still comes directly from the battery. Follow the radio manual and vehicle upfitter guidance, especially on newer vehicles with sensitive body-control modules.
Antenna Placement Determines Radio Performance
The antenna is not an accessory. It is a major part of the radio system. A well-programmed commercial mobile radio with a poorly installed antenna can perform worse than a modest radio with a properly selected and tuned antenna.
The best location depends on vehicle type, frequency band, antenna design, and operating environment. In general, the roof offers the best ground plane and the most even signal pattern around the vehicle. A center-roof mount is often ideal for a metal-roof vehicle because it provides a consistent ground plane and keeps the antenna away from obstructions.
That said, fleet realities matter. Roof racks, ladders, light bars, low-clearance garages, aluminum bodies, fiberglass roofs, and pickup-bed use can change the plan. A fender mount, hood-channel mount, stake-pocket mount, mirror mount, or specialized bracket may be the practical choice. The trade-off is usually reduced signal performance in one or more directions, along with a greater need to confirm proper grounding and cable routing.
Match the Antenna to the Frequency
Do not assume one antenna works for every radio. An antenna designed for VHF will not perform correctly on UHF, and a CB antenna is not suitable for GMRS or commercial 450 MHz service. Select an antenna rated for the exact frequency range and power level of the radio.
For CB and amateur installations, checking standing wave ratio, or SWR, is essential before regular transmitting. A high SWR can reduce range and may damage the radio’s transmitter. Commercial VHF and UHF antennas are often pre-tuned for a band, but the complete installation should still be tested when performance matters.
Use quality coaxial cable with properly installed connectors. Avoid crushing, sharply bending, pinching, or coiling excess coax tightly around other wiring. Keep the cable away from high-heat areas and route it so it cannot be damaged by seat tracks, doors, or cargo.
Install Audio Accessories for Real-World Use
Factory vehicle cabins can be noisy, especially in trucks, utility vehicles, and equipment-heavy fleets. The radio’s internal speaker may be adequate in a quiet sedan but difficult to hear in a diesel work truck or with windows down at a jobsite.
An external speaker can make a major difference. Mount it where sound reaches the driver clearly without blocking controls or creating a distraction. A speaker under the dash or near the center console often works well, but placement depends on cabin layout and ambient noise.
If hands-free operation, public-address functions, headsets, Bluetooth accessories, or dispatch integration are part of the plan, test them before finalizing the wire routing. It is much easier to adjust an accessory cable before trim panels and console components are reinstalled.
Test the Installation Before Putting It in Service
Once the radio is mounted and wired, test more than basic power-up. Verify that the radio transmits and receives on the intended channels, the microphone audio is clear, the speaker is loud enough, and the display remains usable in daylight and at night.
Check voltage while transmitting, particularly on higher-power mobile radios. If the voltage drops significantly, inspect cable gauge, fuse holders, battery connections, and grounding. Also test with the engine both off and running. Alternator whine, ignition noise, or interference from vehicle electronics may only appear when the engine is operating.
For licensed services, confirm the radio is programmed only for authorized frequencies and emissions. Commercial operations, GMRS users, amateur operators, and public-safety-adjacent organizations all have different rules. Proper programming and licensing are as important as clean wiring.
Document the installation for fleet vehicles. Record the radio model, serial number, programmed configuration, antenna type, mounting location, and service date. This makes future troubleshooting much faster and keeps equipment consistent across the fleet.
A clean mobile installation should feel almost invisible to the driver: the radio is where it needs to be, the audio is clear, and the wiring is protected from daily abuse. If the vehicle is mission-critical or the installation involves multiple radios, repeaters, dispatch equipment, or specialized licensing, bringing in an experienced communications technician is often the most economical choice over the life of the system.