
A DMR radio can look perfectly configured and still fail the moment a crew needs it. Usually, the issue is not the radio itself. It is a mismatched color code, the wrong time slot, a missing talkgroup, or a channel assigned to the wrong zone. Knowing how to program DMR radios means building a configuration that matches the way your people actually communicate, not simply loading frequencies into a device.
For a construction crew, hotel staff, delivery fleet, or volunteer organization, a well-built DMR codeplug keeps routine traffic organized and makes it easier to reach the right people without tying up every radio on the system.
Start With the System Plan, Not the Programming Cable
Before opening the customer programming software, define what the radio system needs to accomplish. A single-site operation may need only a few work groups: operations, maintenance, security, and an all-call channel. A multi-location business may need separate talkgroups for each facility, plus regional dispatch and emergency communications.
This planning step prevents a common problem: a radio programmed with dozens of channels that users cannot identify quickly in the field. Give channels clear names that make sense on a small radio display, such as “OPS 1,” “WAREHOUSE,” “FRONT DESK,” or “EMERG.” The best layout depends on the size of the team, coverage area, and whether the radios use direct radio-to-radio communications, a local repeater, or a wider linked network.
Also confirm the operating authority before programming transmit frequencies. In the United States, most business DMR systems operate under an FCC license and use assigned frequencies. Amateur DMR use follows different rules and requires a valid amateur license. A radio may be capable of many bands and modes, but that does not authorize use on every frequency.
Gather the Information Your DMR Radio Needs
DMR programming is built around several settings that must agree across the radios and any repeater in use. If one value is wrong, users may hear nothing, transmit unsuccessfully, or interfere with a different group.
At minimum, collect the transmit and receive frequencies, bandwidth, color code, time slot, talkgroup or contact ID, and each radio’s unique subscriber ID. For repeater operation, obtain these details from the system administrator or frequency coordinator rather than guessing.
A conventional analog channel generally needs a transmit frequency, receive frequency, and optional CTCSS or DCS tone. DMR adds more structure. It divides one 12.5 kHz channel into two time slots, allowing two separate voice paths to share the same RF channel. The color code acts somewhat like a digital access code, helping radios identify the intended DMR system. It is not encryption and should not be treated as a security feature.
Understand the DMR Building Blocks
Most manufacturers use different labels in their programming software, but the underlying structure is similar:
- Digital contact or talkgroup: The individual, group, or all-call destination for a transmission.
- Channel: The operating entry that combines frequencies, color code, time slot, contact, power level, and other settings.
- Zone: A folder that groups related channels for easier use on the radio.
- Receive group list: The talkgroups a radio will monitor while parked on a particular channel.
- Scan list: Channels the radio checks automatically when scan is enabled.
For example, a repeater may use Color Code 1. Operations could use Time Slot 1 and Talkgroup 101, while maintenance uses Time Slot 2 and Talkgroup 102. Both groups can share the same repeater frequency pair while remaining separate in normal use.
How to Program DMR Radios in the CPS
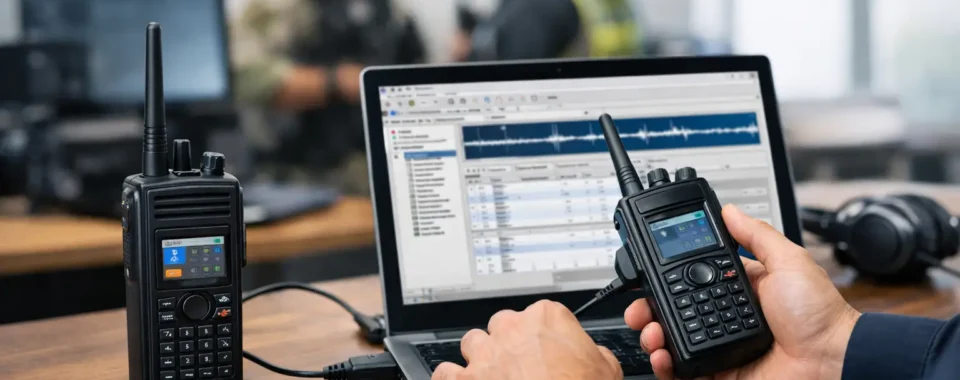
Use the correct customer programming software, or CPS, for the radio model. Even radios that appear similar may use different software versions, cable drivers, firmware, or codeplug formats. Start by reading the existing radio configuration and saving an untouched backup with a date and radio serial number. That backup can save substantial time if a programming change creates an issue.
Next, enter the radio’s unique digital ID. On commercial systems, IDs are often assigned internally by the radio administrator. On amateur DMR networks, the operator may have a network-issued DMR ID. Do not duplicate IDs across active radios. Two radios using the same ID can create confusing identification and network behavior.
Create the required digital contacts. A group call contact is normally used for a department or work group, while a private call contacts one radio ID. Some systems also use all-call or emergency contacts, but these should be configured carefully and only where the system design supports them.
Then build each channel. Enter the proper receive and transmit frequencies, select digital mode, apply the correct color code and time slot, and assign the intended transmit contact. Set the transmit power based on the coverage plan. High power may be useful for direct radio-to-radio work over a large property, but it can reduce battery runtime and cause unnecessary interference. On a repeater system, the repeater location and antenna system usually matter more than simply increasing handheld power.
Assign the appropriate receive group list to each channel. This setting is often overlooked. If the channel is programmed to transmit on Operations but its receive group list excludes Operations, users may transmit successfully yet fail to hear replies. For a straightforward business system, keeping the receive list limited to relevant groups makes radio traffic easier to follow.
Finally, place the channels into logical zones. A facilities team might have one zone for daily operations and another for building-specific channels. A fleet may use zones by region. Keep the most-used channels near the top, because field users should not have to scroll through a long list during a time-sensitive call.
Program Practical Radio Features Carefully
The channel settings make the system work, but the radio features determine how usable it is in daily operations. Set the display name, channel announcement, programmable buttons, emergency behavior, scan function, and lone worker settings to match the work environment.
Voice announcements can help users who wear gloves or operate radios without looking at the screen. A programmable button for monitor, scan, or a designated emergency function can be useful, but avoid assigning critical functions where they can be pressed accidentally. Emergency features require a complete system plan. A radio alarm is only valuable if someone is designated to receive and respond to it.
Privacy settings also deserve a clear distinction. Basic DMR privacy features can discourage casual listening, but they are not equivalent to strong encryption and may not meet requirements for sensitive operations. If your organization needs protected communications, discuss the appropriate radio, system, policy, and legal requirements before relying on a menu setting labeled “privacy.”
Write the Codeplug and Test It in the Field
After writing the codeplug to the radio, test more than one radio. A successful programming upload only proves that the computer communicated with the device. It does not prove that the radio works correctly on the system.
Begin with a simple radio check on every programmed channel. Confirm that each radio transmits, receives, displays the expected channel name, and reaches the intended talkgroup. Test at the edge of the real work area, inside buildings, near loading docks, around machinery, and anywhere coverage has historically been difficult.
Listen for clipped audio, delayed call setup, weak receive audio, or unexpected traffic from another group. Verify that scan does not cause users to miss important calls and that emergency procedures work as intended. If the system uses a repeater, test both time slots and confirm the repeater is carrying the expected talkgroups.
Keep a master codeplug and document changes. As employees, sites, or workflows change, the radio configuration should change with them. Controlled updates are far easier than maintaining several undocumented versions created one radio at a time.
Common DMR Programming Problems
When a DMR radio does not communicate, start with the fundamentals. Check that both radios use the same frequency pair, color code, time slot, and talkgroup. On simplex channels, radios generally need matching transmit and receive frequencies. On repeater channels, confirm that the frequency pair is entered in the correct direction.
If one radio can transmit but cannot hear replies, inspect the receive group list and digital contact assignment. If users hear traffic from the wrong department, review talkgroup selection, scan lists, and channel naming. If nobody can access the repeater, verify the licensed frequency information, repeater status, color code, time slot, and coverage at the test location.
Firmware and CPS versions can matter too. A newer codeplug may not load correctly into an older firmware version, and an incorrect programming cable or driver can cause incomplete writes. Make changes methodically, one variable at a time, and save a known-good version before experimenting.
A DMR radio system works best when its programming reflects the people, property, and procedures it supports. If the codeplug is becoming difficult to manage, or coverage and licensing questions are part of the project, experienced technical support can turn a collection of radios into a communication system your team can depend on.